Slow-loading WordPress sites often have one culprit: poorly optimized images. Here’s why this matters:
- 40% of users abandon sites that take over 3 seconds to load.
- Google uses site speed as a ranking factor, so slow performance can hurt your SEO.
- Poor image compression leads to larger file sizes, slower load times, and bad user experiences.
The good news? Properly compressing images can drastically reduce file sizes without sacrificing quality. But many site owners make mistakes that sabotage their efforts. Here are the 7 most common mistakes and how to avoid them:
- Using the wrong image format (e.g., PNG for photos instead of JPEG or WebP).
- Uploading uncompressed, high-resolution images directly to WordPress.
- Over-compressing images, leading to pixelation and poor quality.
- Using incorrect image dimensions, which bloats file sizes unnecessarily.
- Relying solely on manual optimization, which is time-consuming and inconsistent.
- Not saving original images before compression, making it hard to fix mistakes later.
- Neglecting media library maintenance, resulting in clutter and slower performance.
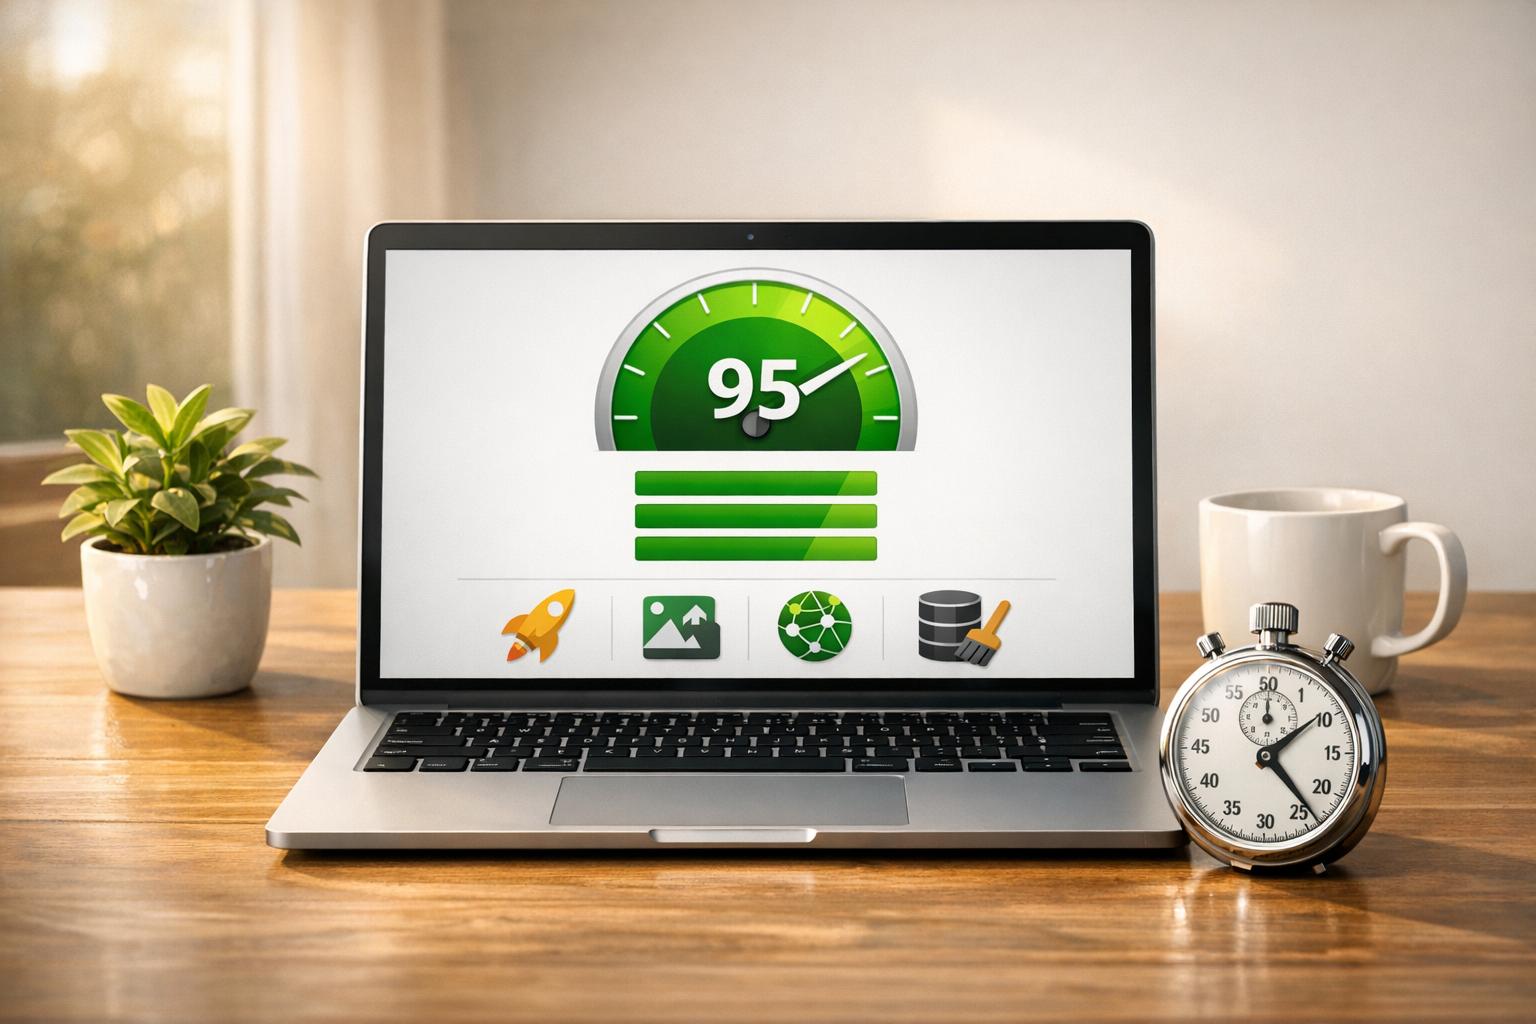
Each of these issues can slow your site and frustrate visitors. The solution? Use the right tools, formats, and workflows to optimize images efficiently. Plugins like Smush, EWWW Image Optimizer, or ShortPixel can automate much of the process, saving you time and effort.
Quick Tip: Always save backups of your original images, pre-compress before uploading, and use modern formats like WebP for smaller file sizes.
You’re Uploading Images Wrong (Fix This and Speed Up Your Site)
1. Choosing the Wrong Image Format
Selecting the wrong image format can lead to unnecessarily large file sizes, which can significantly slow down your WordPress site – especially if you’re managing dozens or even hundreds of images. This simple misstep can affect not just your site’s speed but also image quality and the performance of plugins.
Many site owners in the U.S. default to PNG for its clarity or stick with JPEG out of habit. However, each format has a specific purpose, and using the wrong one can hurt your site’s performance more than you might realize.
Impact on Site Speed and Performance
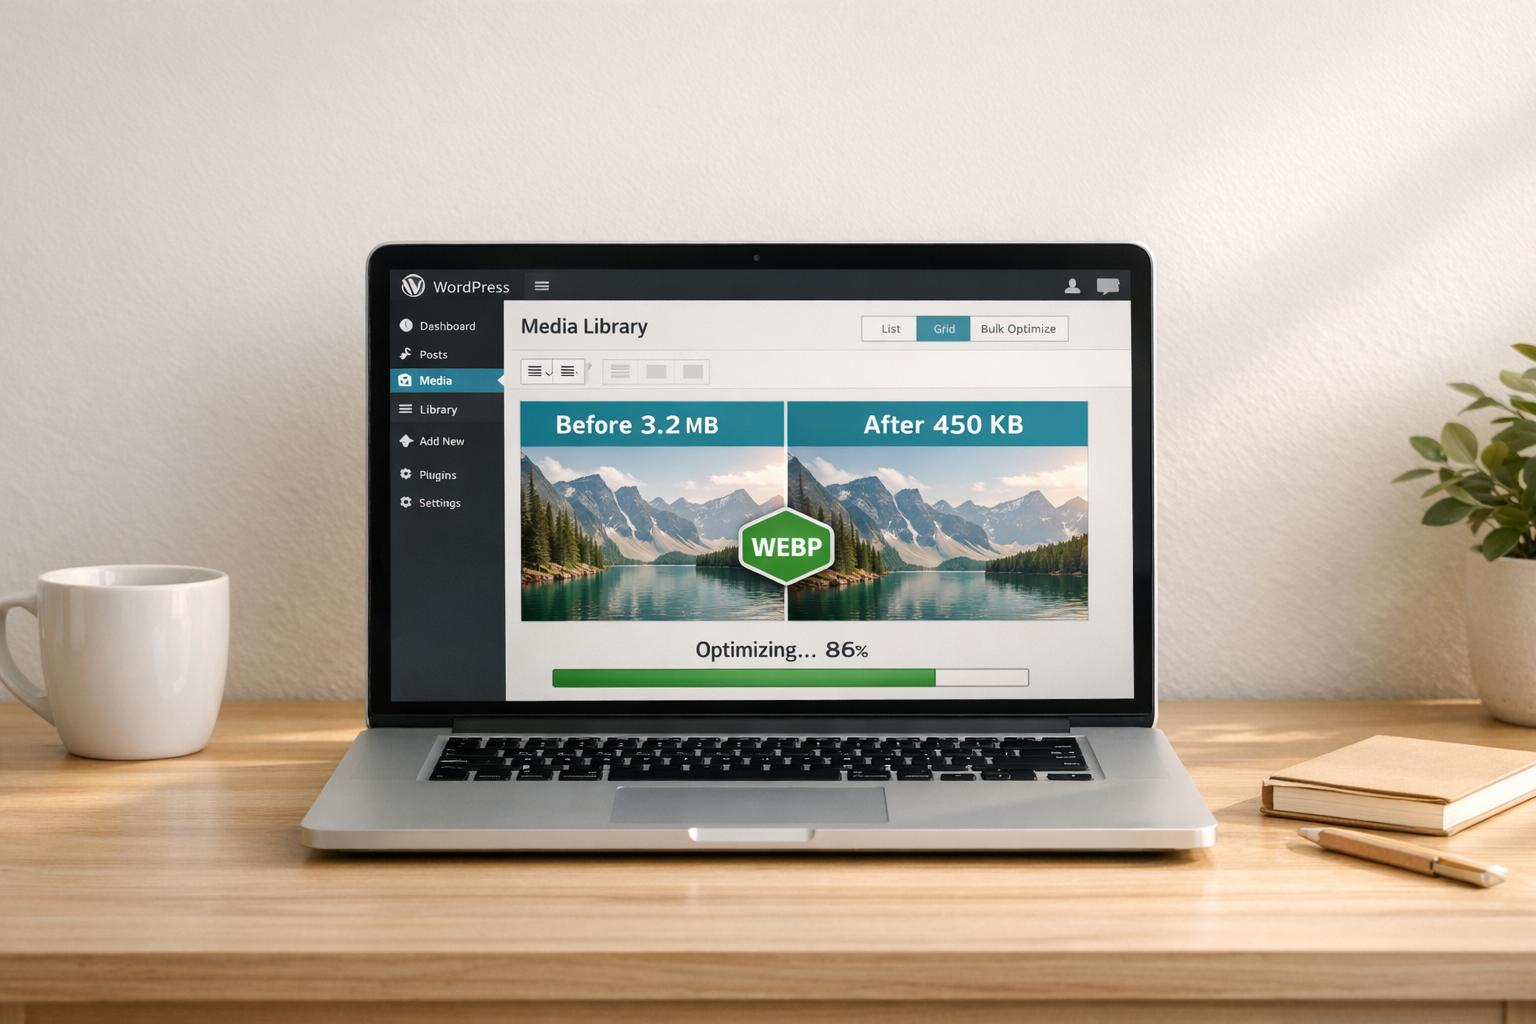
When you use an unsuitable image format, your site ends up loading larger files than necessary. For example, WebP files are often 25–50% smaller than JPEGs while maintaining comparable quality. This reduction in size is crucial for mobile users, who often deal with limited data plans and inconsistent connection speeds. On the other hand, using PNG for photographs instead of JPEG can double or even triple file sizes, causing load times to exceed acceptable limits.
Effect on Image Quality
The choice of format also plays a big role in how your images look. JPEG works best for photos with complex color gradients because it compresses them efficiently. PNG, on the other hand, is ideal for screenshots, illustrations, and other images with sharp lines or text, thanks to its lossless compression. If you use JPEG for graphics with clean edges, you may see blurry artifacts, while using PNG for detailed photos unnecessarily inflates file sizes without improving quality. Knowing which format fits your needs can make a huge difference.
Ease of Implementation
Once you understand the strengths of each format, deciding which to use becomes simple. For photos, stick with JPEG for its efficient compression. Use PNG for graphics like screenshots, icons, and illustrations. Avoid using PNG for photos, as it results in larger file sizes without any real benefit. If you’re looking for a modern, versatile option, WebP is a great choice. It supports both lossless and lossy compression, along with transparency. However, since WordPress only supports JPG/JPEG, PNG, GIF, and ICO formats by default, you’ll need a plugin to enable WebP conversion.
Compatibility with WordPress Plugins and Tools
Most WordPress optimization plugins handle standard formats like JPEG and PNG effectively, but support for newer formats like WebP can vary. For instance, Smush optimizes JPEG and PNG files, while EWWW Image Optimizer works with JPG, PNG, GIF, and even PDFs. With WordPress 5.8, native support for WebP was introduced, making it easier to adopt this efficient format.
For the best results, use JPEG or WebP for photos to balance quality and compression. For images requiring transparency, such as icons or logos, opt for PNG or SVG formats. By matching the format to the image type, you can ensure your site runs smoothly without sacrificing visual quality.
2. Uploading Images Without Pre-Compression
A common misstep many WordPress site owners make is uploading high-resolution images directly from cameras or design tools without compressing them first. These large, uncompressed files can significantly slow down your site, especially when dealing with images that are several megabytes in size.
High-resolution photos are far larger than what’s necessary for web use. A single uncompressed image can easily take up 5–10 MB or more, leading to slower load times for visitors and unnecessary use of server storage. Let’s break down how this impacts your site’s performance and image quality.
Impact on Site Speed and Performance
Uploading uncompressed images takes a toll on your website’s speed. Large image files can lead to sluggish page loading, particularly for visitors on mobile networks.
Compressing images before uploading saves disk space, speeds up your website, improves user experience, and even boosts SEO. Without pre-compression, WordPress has to handle oversized files, which puts extra strain on server resources and bandwidth.
Moreover, WordPress generates several thumbnail versions of every uploaded image. If your original image is uncompressed, these thumbnails will still be larger than necessary, further affecting performance.
Effect on Image Quality
Contrary to what some might think, skipping pre-compression doesn’t ensure better image quality. WordPress automatically compresses uploaded images, but pre-compressing gives you more control over the balance between visual quality and file size.
That said, over-compressing images before uploading can backfire. Since WordPress generates thumbnails from the uploaded image, starting with an overly compressed file can result in thumbnails that are larger than they need to be. Achieving the right balance is key.
Ease of Implementation
The good news? Pre-compressing images is simple once you get into the habit. Tools like TinyPNG or image editing software make it easy to compress files before uploading.
To optimize images for the web:
- Resize them to keep file sizes under a few hundred kilobytes.
- Use web-friendly formats like JPEG or PNG.
- Stick to 72 dots per inch (dpi), which is perfect for screen displays.
This small effort can make a big difference in reducing page load times.
Compatibility with WordPress Plugins and Tools
Pre-compression works seamlessly with most WordPress optimization tools, but it’s important to avoid conflicts. Stick to one image compression plugin to prevent issues.
WordPress plugins like Smush automatically optimize images by compressing them and serving smaller versions on your site. Alternatively, some users prefer software like Photoshop to handle compression before uploading. Both approaches work well, but combining them requires careful planning to avoid redundancy.
Popular optimization plugins, such as Smush, are compatible with tools like WP All Import, WP Offload Media, WP Media Folder, WP Retina 2x, NextGen Gallery, WPML, Envira Gallery, and Avada Fusion Builder.
Taking time to optimize images upfront is a straightforward way to ensure your WordPress site runs efficiently. If you’re unsure about the best workflow for your site, WP Support Specialists can help you tailor a solution to keep your site fast and user-friendly.
3. Compressing Images Too Much and Damaging Quality
Compressing images is a must for improving website performance, but taking it too far can do more harm than good. Over-compression often results in pixelation and visual artifacts, which can make your site look unprofessional and unappealing – even if it loads quickly. This kind of poor presentation can turn visitors away, undermining your efforts to create a great user experience.
The common belief that smaller file sizes always mean better performance can backfire when images lose their clarity and purpose. Striking the right balance is key to maintaining both speed and quality.
Effect on Image Quality
When images are excessively compressed, they develop visible flaws like pixelation, color banding, and blurriness. These issues are especially noticeable in detailed visuals, such as product photos, portraits, or graphics containing text. For e-commerce websites, this can be a deal-breaker. Clear, high-quality product images are essential for helping potential customers make confident purchasing decisions.
To avoid these pitfalls, optimize your images carefully, ensuring they retain enough detail and clarity.
Impact on Site Speed and Performance
Images often account for around 50% of a website’s loading time. While optimization is crucial for improving speed, it’s important to find a middle ground that doesn’t compromise the visual quality of your site.
Simplifying the Process with WordPress Plugins
WordPress plugins make it easier to balance image quality and performance. Many use advanced algorithms to analyze and compress images at optimal levels automatically. These plugins often rely on external servers for the heavy lifting, reducing the strain on your hosting environment. While fine-tuning compression settings can be tricky, these tools help simplify the process, ensuring your images look good without slowing your site down.
Choosing the Right Tools for WordPress
The best image optimization plugins offer flexible settings, allowing you to adjust compression levels based on the type of image and its purpose. Features like automatic compression, bulk optimization, and support for modern formats like WebP and AVIF can make a big difference. For example, some plugins let you apply higher quality settings to hero images while using more aggressive compression for background graphics. Pairing these tools with a CDN (Content Delivery Network) can further enhance delivery speed without sacrificing image quality.
If you’re struggling to find the right balance, tools like these can save you time and effort. And if you need extra assistance, WP Support Specialists can help you fine-tune your optimization settings to ensure your site performs well while looking its best.
4. Using Wrong Image Dimensions
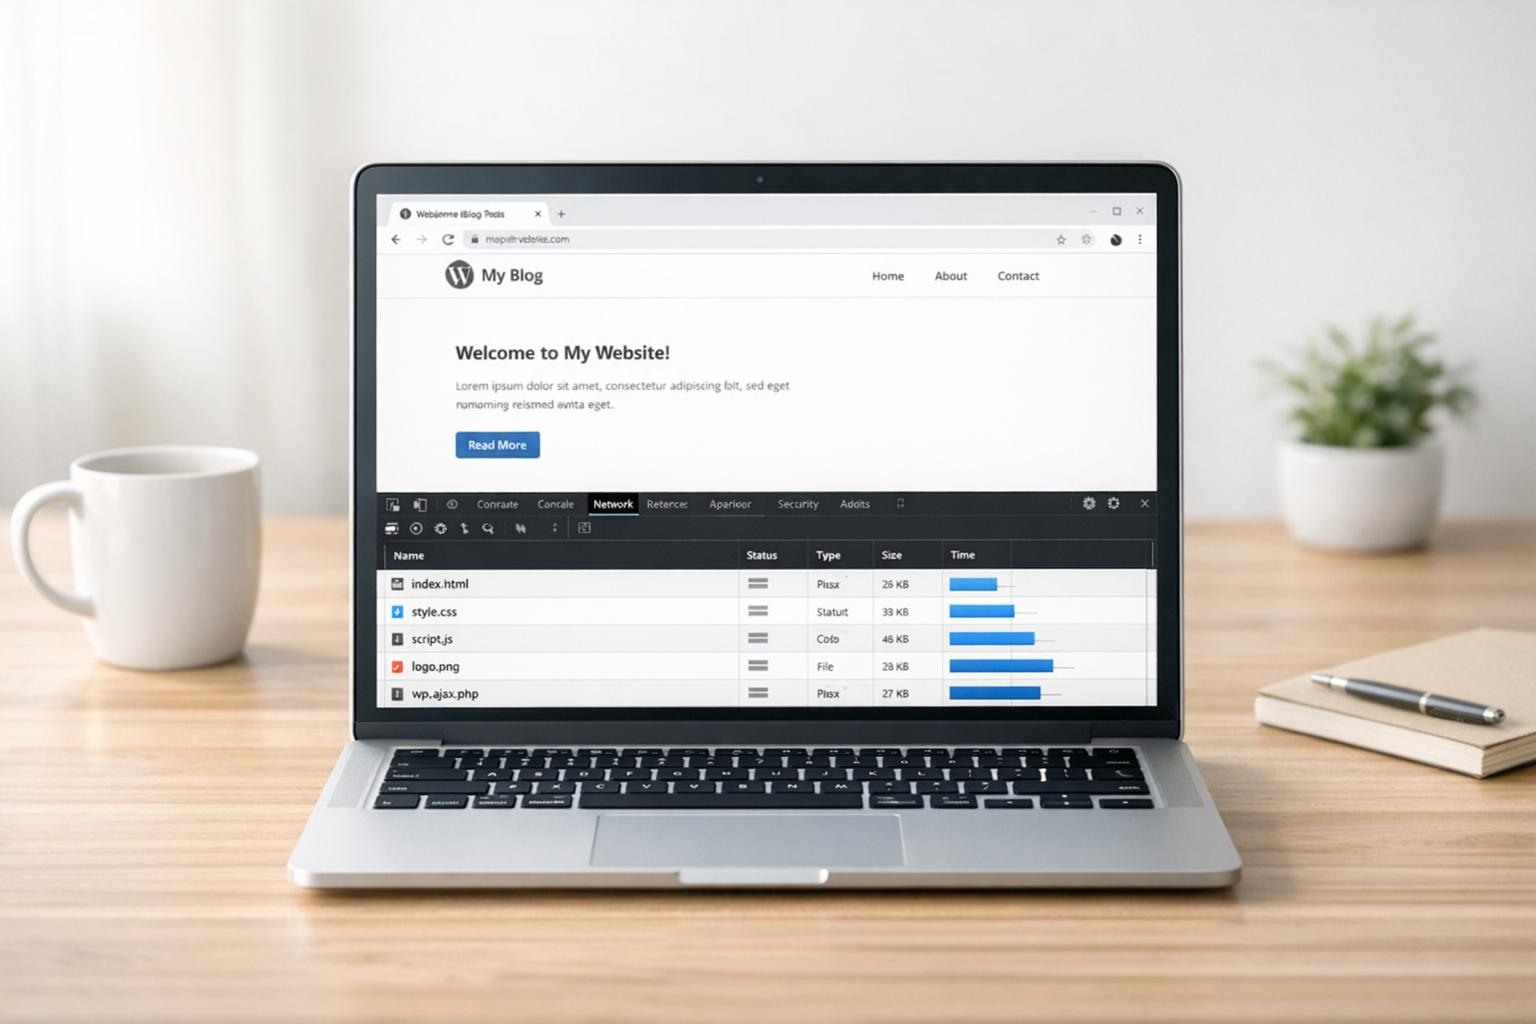
Uploading images with the wrong dimensions is a common misstep that can negatively impact your WordPress site’s performance. Oversized images force visitors to download unnecessary data, leading to slower load times and a less enjoyable browsing experience.
Images typically account for about 40–44% of a page’s total weight. When image dimensions aren’t optimized, this percentage increases, especially on mobile devices where bandwidth is often limited. This can result in sluggish performance and a frustrating user experience.
Impact on Site Speed and Performance
Large images require browsers to process more pixel data than needed, which not only slows down load times but also consumes more bandwidth. This can lead to layout issues, particularly on smaller screens. According to Google, a jump in page load time from 1 to 3 seconds can increase bounce rates by 32%. Since page speed directly influences search rankings, using improperly sized images can hurt both your site’s SEO and its usability. On top of that, oversized images that don’t fit mobile screens properly can disrupt your site’s design, making it look unpolished.
Effect on Image Quality
Contrary to what you might think, bigger images don’t always mean better quality. When browsers resize large images to fit smaller spaces, the automatic scaling can introduce blurriness or other visual distortions. On the other hand, images that are uploaded at the correct dimensions maintain their sharpness and clarity. This also improves page load times, user experience, and Core Web Vitals scores. To avoid these issues, it’s best to upload images that match the exact dimensions required for their display, minimizing the need for browser scaling and keeping your visuals crisp.
| Website Image Type | Recommended Dimensions |
|---|---|
| Blog images | 1,200 x 630 pixels |
| Hero images | 1,280 x 720 pixels |
| Background images | 1,920 x 1,080 pixels |
| Thumbnails | 150 x 150 pixels |
| Logo (rectangle) | 250 x 150 pixels |
Compatibility with WordPress Plugins and Tools
WordPress automatically generates multiple sizes for each uploaded image – such as thumbnail, medium, and large – alongside the original. However, this feature won’t fix the issue if the original image is too large to begin with.
Thankfully, modern WordPress plugins can simplify the image optimization process. For example, in January 2024, Team Updraft spotlighted WP-Optimize, a plugin that compresses images, optimizes uploads, and even converts them into the WebP format. It also offers options to prioritize either compression or image detail.
Other tools, like TinyIMG, can automatically resize images during uploads to ensure they meet your theme’s specific requirements. Using these tools, alongside pre-upload resizing, helps maintain consistent image dimensions across your site and ensures optimal performance.
For the best results, determine the image dimensions your theme requires and resize images before uploading. Most websites should aim for image widths between 1,280 and 1,920 pixels, with file sizes kept under 200 KB. If you’re unsure about how to optimize your images, WP Support Specialists can guide you through resizing techniques to keep your site running smoothly.
sbb-itb-976b402
5. Doing All Image Optimization by Hand
Relying entirely on manual image optimization can seriously hinder your website’s performance. While you might think handling every detail yourself – like compression, resizing, and choosing file formats – gives you better control, it’s a time-consuming and inconsistent approach that can negatively impact your site in the long run.
Impact on Site Speed and Performance
One of the biggest downsides to manual optimization is inconsistency. When you’re managing dozens or even hundreds of images, it’s easy to miss a few or apply uneven compression levels. This results in a mix of optimized and unoptimized images, which can slow down your site. And slow pages are costly: Google’s research shows that as page load time increases from 1 to 3 seconds, the likelihood of a visitor bouncing jumps by 32%.
Another issue is the delay it creates in publishing content. While you’re busy manually compressing and resizing images one by one, visitors are still being served unoptimized files. This lag can hurt your site’s performance and user experience.
When multiple team members are involved, the problem only grows. Different people may use varying optimization settings based on their technical skills or personal preferences, leading to inconsistent results. Some images may be perfectly optimized, while others remain bloated and slow-loading.
Effect on Image Quality
Manual optimization can also harm image quality if not done carefully. Over-compression might leave some images looking pixelated and blurry, while others might barely be optimized at all. This inconsistency creates a poor user experience, with visitors encountering clear, sharp images on one page and low-quality, over-compressed ones on another.
The Challenge of Scaling Up
Manual optimization becomes unmanageable as the number of images on your site grows. While it might be feasible for a small blog with 20 images, it’s simply not practical for an e-commerce site with thousands of product photos. The time required increases with every image, making this approach unsustainable.
Another hurdle is the technical knowledge needed to optimize images effectively. Understanding file formats, compression algorithms, and ideal settings for different image types isn’t something everyone on your team may be equipped to handle. This can create bottlenecks in your content workflow, slowing down the entire process.
Why Automation Is the Better Option
Thankfully, modern WordPress plugins have made manual optimization largely unnecessary. These tools can handle bulk processing, ensure consistent quality, and integrate seamlessly into your workflow. Many plugins even optimize images automatically upon upload, saving you time and effort.
A smart approach is to combine both methods: manually resize images to the correct dimensions before uploading, and then let automated plugins handle compression and format conversion. This hybrid strategy gives you control over the most critical aspects while automating the tedious work.
If manual optimization is slowing you down, consider reaching out to WP Support Specialists. They can help you set up automated tools that maintain high image quality while cutting down the time spent on processing. With automation, you can ensure consistent performance across your site without the headaches of doing it all by hand.
6. Failing to Save Original Images Before Compression
One common misstep in WordPress image optimization is skipping the step of saving backup copies of your original, uncompressed images. This can lead to major headaches later, especially if you need to tweak compression settings or regenerate higher-quality thumbnails. Keeping the originals is essential for fixing earlier compression mistakes and ensuring your site continues to perform well.
Effect on Image Quality
Compressing an image without storing the original means you’re permanently deleting data. Every time you compress, there’s a loss in quality that can’t be undone. If your compression settings are too aggressive, your images may end up looking blurry or pixelated.
“Once your images are compressed at a high level, they cannot be reverted as the information is already lost”, says Delyan Delov.
Without original files, you’re left with no choice but to use low-quality images or go through the hassle of re-uploading and re-optimizing your files.
Compatibility with WordPress Plugins and Tools
Having original images on hand gives you much more flexibility when using WordPress optimization plugins and tools. Different plugins use different compression methods, and having access to the originals allows you to experiment with settings without risking permanent quality loss.
Some premium optimization plugins even offer features to restore original images – but they can only do this if the originals were saved in the first place. Without backups, switching plugins or adjusting settings becomes a gamble that could further degrade your images. Saving original images not only makes it easier to work with plugins but also simplifies the entire optimization process.
Ease of Implementation
Saving original images is straightforward. Upload high-quality, uncompressed images and let your optimization plugin handle the compression. Many plugins automatically create backups of your originals, giving you the ability to revert if needed.
If you’ve already compressed images without saving the originals, check if you have a backup of your uploads folder from before the compression. You can restore those files by deleting the compressed versions, re-uploading the originals, and applying better compression settings.
For long-term image management, create a workflow where team members always upload the highest quality images available. From there, rely on automated tools to handle the optimization. This approach ensures you have full control over your compression settings and the flexibility to adjust them as your site’s needs evolve.
If you’re dealing with over-compressed images or need help setting up a reliable backup system, WP Support Specialists can guide you in implementing the right tools and workflows. Protect your visual content and keep your site running smoothly by following these best practices for media management.
7. Skipping Media Library Maintenance
Your WordPress media library isn’t something you can set and forget. Without regular attention, it can turn into a chaotic mess of files that not only slows your site down but also makes managing images a frustrating chore.
Impact on Site Speed and Performance
An unorganized media library can drag down your site’s loading speed. Duplicate files and unused images take up precious server space and inflate your database. This clutter forces WordPress to work harder, slowing down processes like database queries, backups, and even simple admin searches. Over time, this can noticeably impact your site’s performance.
Effect on Image Quality
Disorganized media can also lead to inconsistent visuals on your site. When files are scattered and poorly labeled, it’s easy to mistakenly use a low-quality image or an incorrectly sized one. For instance, you might end up using an over-compressed thumbnail instead of a properly optimized full-size image. This can make your site look unprofessional, with pixelated or blurry visuals undermining your overall design.
Compatibility with WordPress Plugins and Tools
Thankfully, there are plugins designed to help you clean up and manage your media library. Tools like Media Deduper, Media Library Folders, and Media Cleaner can identify duplicates, create folder structures, and remove unused files. These plugins simplify the maintenance process and help keep your library in check.
Ease of Implementation
Automating your media library upkeep can save you a lot of time and headaches. Look for plugins that offer features like automated compression, bulk optimization, and seamless integration with your current themes and plugins. Start by removing duplicates and unused files, then organize your library with a logical folder structure. Set up rules for new uploads – such as proper naming conventions and compression settings – and schedule regular maintenance checks. Keeping your media library tidy not only supports the image optimization strategies mentioned earlier but also ensures your site runs smoothly for the long haul.
WordPress Image Compression Plugin Comparison
Picking the right image compression plugin can make a noticeable difference in your website’s speed and overall user experience. With images accounting for more than 60% of total bandwidth usage, it’s clear why this choice matters. Below, we’ve broken down some of the top plugins to help you find the best fit for your site.
To get the most out of your optimization efforts, it’s essential to avoid common compression pitfalls and choose a plugin that aligns with your needs. Here’s a quick comparison of popular options:
| Plugin | Free Plan | Paid Plans | Key Strengths | User Rating |
|---|---|---|---|---|
| Smush | Unlimited images (5MB limit) | From $3/month | Unlimited free compression, high user satisfaction | 4.8/5 stars |
| EWWW Image Optimizer | Lossless, server-side optimization | From $7/month (includes CDN) | No file size limits, server-side processing | 4.7/5 stars |
| Optimole | Up to 1,000 monthly visitors | From $19.08/month (40,000 visitors) | Built-in CDN, dynamic optimization | 4.7/5 stars |
| ShortPixel | 100 images/month | From $4.99/month (5,000 images) | Reliable mobile performance, flexible compression options | 4.5/5 stars |
| Imagify | Up to 20MB/month | From $4.99/month (500MB) | Excellent JPG optimization, user-friendly interface | 4.3/5 stars |
Key Insights on Each Plugin
Smush stands out with its 4.8-star rating across nearly 6,000 reviews. Its free plan allows unlimited image compression for files up to 5MB, making it a favorite among users on a budget. Smush also supports modern formats like WebP and AVIF, which can significantly cut down file sizes. As Smush puts it:
“Smush is the leading image optimization plugin – optimize, resize, and compress images, as well as convert images to WebP or AVIF format for faster loading web pages.”
EWWW Image Optimizer processes images directly on your server, offering enhanced privacy. Its lack of file size limits in the free version makes it a strong choice for handling large files. With a 4.7-star rating from over 1,700 reviews, it’s a reliable option, though some users have noted occasional concerns with WebP quality.
Optimole dynamically optimizes images in real time based on the visitor’s device. While it offers cutting-edge features like a built-in CDN, some users find its configuration process tricky. The visitor limits on its plans may also be a drawback for larger sites.
ShortPixel is praised for its consistent mobile performance and flexible compression settings. By offloading compression to external servers, it’s a good fit for sites hosted on shared servers. However, sending images to third-party services might not appeal to everyone, and some users have raised concerns about customer support.
Imagify delivers strong results for JPG files and boasts an intuitive interface. Its free plan, however, limits users to 20MB of compression per month. At $4.99 per month for 500MB, the paid plan offers predictable pricing, which can simplify budget management.
Choosing the Right Plugin for Your Needs
When deciding, think about what matters most for your site. For example:
- If you frequently handle large files, EWWW Image Optimizer is a great choice with no file size restrictions in its free plan.
- For sites with heavy mobile traffic, ShortPixel’s reliable performance might be worth the investment.
- Budget-conscious users often lean toward Smush, thanks to its generous free tier.
- If advanced features like real-time optimization are a priority, Optimole could be the right fit.
Google recommends keeping image file sizes under 100KB. Modern formats like WebP and AVIF can reduce file sizes by up to 60%, so selecting a plugin that supports these formats is a smart move.
Lastly, don’t overlook security. Choose a plugin that offers clear policies on vulnerabilities and regular updates. For all-around WordPress security, consider pairing your image optimization tool with a comprehensive security solution.
If you need tailored advice for optimizing your site, WP Support Specialists can provide expert guidance to enhance your WordPress experience.
Conclusion
Steering clear of these seven image compression mistakes is key to keeping your WordPress site running smoothly and delivering a top-notch user experience. Did you know that most visitors will leave a site if it takes longer than 3 seconds to load?. Even more striking, the likelihood of a bounce increases by 32% as load time jumps from 1 to 3 seconds. These numbers highlight just how critical speed is.
The benefits of faster load times aren’t just theoretical – they’re backed by real-world results. In 2017, Zitmaxx Wonnen cut their load time to 3 seconds and experienced a 50% boost in mobile conversions and a 98.7% increase in mobile revenue. Similarly, NDTV saw their bounce rate drop by 50% in 2020 after improving their Largest Contentful Paint (LCP) and Cumulative Layout Shift (CLS) scores. These examples show how optimizing performance can directly impact business outcomes.
“Optimizing images may seem like a small part of your overall site strategy, but it’s one of those things that creates ripple effects for visitors, search engines, and your own peace of mind. With faster load times, better SEO, and a smoother browsing experience, everyone wins.” – Ryan Sullivan, Chief of Staff, SiteCare
To achieve these results, focus on a well-rounded approach: selecting the right image formats, pre-compressing files, balancing quality and size, ensuring proper dimensions, automating processes, maintaining backups, and keeping your media library organized. With mobile traffic making up nearly 60% of global web traffic, optimizing images for all devices is no longer optional – it’s essential.
If you’re looking to put these strategies into action, WP Support Specialists offers tailored WordPress solutions to help you improve site speed, boost engagement, and climb the search rankings while following best practices that deliver measurable results.
FAQs
What is the best image format to use for different types of images on my WordPress site?
When deciding on an image format, it’s all about matching the format to the image’s purpose. JPEG works best for photos or detailed images with lots of colors, as it balances good quality and smaller file sizes. If you need transparency or crisp details – think logos or graphics – PNG is the way to go. For a newer, more efficient option, WebP is a strong choice, offering reduced file sizes while maintaining high quality. Picking the right format can make a big difference in your website’s speed and overall performance.
How can I properly compress images before uploading them to WordPress?
To keep your WordPress site running efficiently, begin by resizing images to fit the exact dimensions they’ll display on your site. Next, compress these images using trusted tools such as TinyPNG or Photoshop. These tools help reduce file sizes without sacrificing quality. Once optimized, upload the images to your site to cut down load times and boost overall performance.
How can I optimize images automatically to improve my WordPress site’s speed and performance?
To keep your WordPress site performing at its best, you can automate image optimization with the help of plugins. Tools like Smush, ShortPixel, or Imagify can handle tasks like compressing images, resizing them, and even converting files to modern formats such as WebP or AVIF right when you upload them. These plugins are designed to improve loading times while preserving image quality, ensuring your site remains quick and efficient.
By automating image optimization, you not only save time but also guarantee consistent performance. Simply install your chosen plugin, tweak the settings to your needs, and let it take care of the rest.