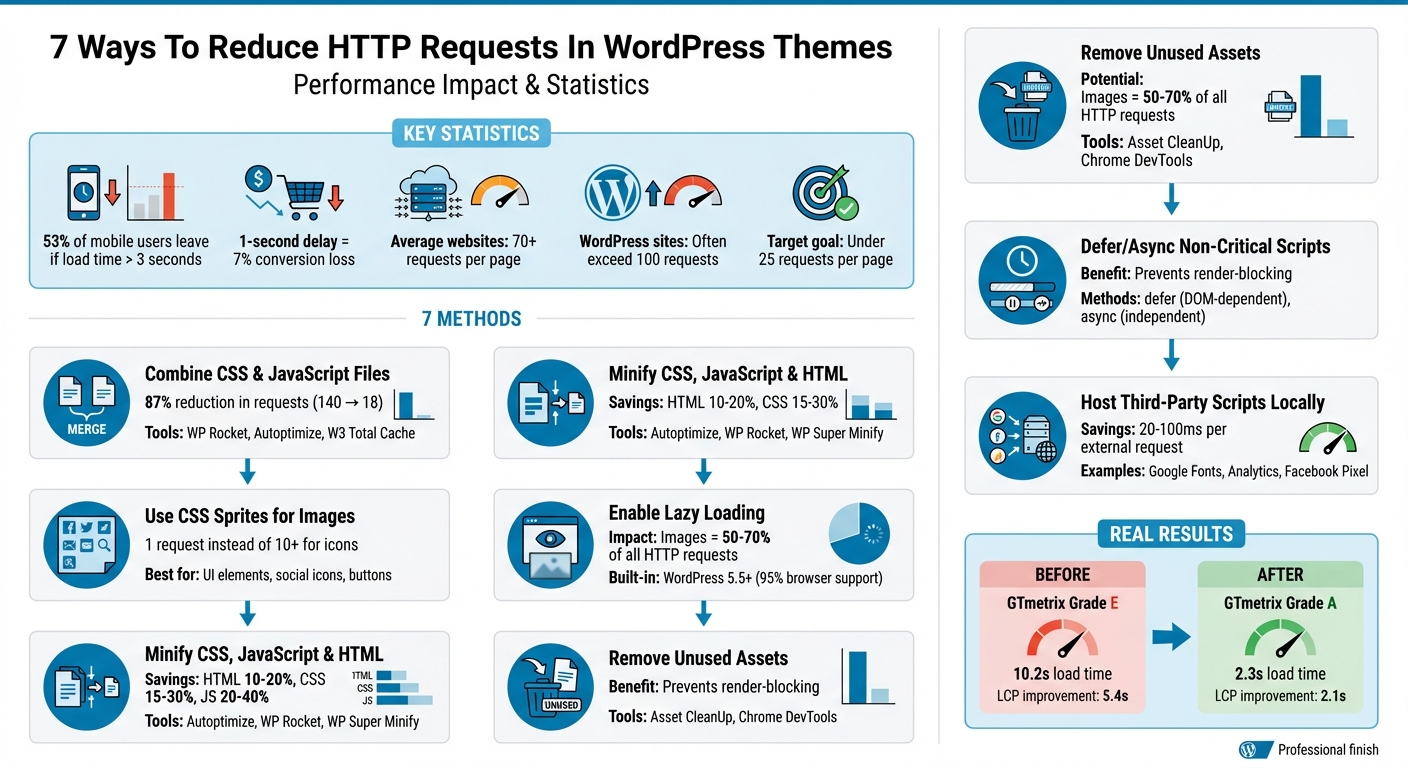
Every time someone visits your WordPress site, their browser makes multiple HTTP requests to fetch files like CSS, JavaScript, images, and fonts. These requests can slow down your site, increasing load times and causing visitors to leave. On average, websites make 70+ requests per page, and WordPress sites often exceed 100, leading to significant delays. The result? 53% of mobile users leave if a site takes more than 3 seconds to load, and even a 1-second delay can lower conversions by 7%.
To fix this, aim for fewer than 25 requests per page. Here’s how you can achieve that:
- Combine CSS and JavaScript files to reduce connection overhead.
- Use CSS sprites to consolidate small images into one file.
- Minify CSS, JavaScript, and HTML to shrink file sizes.
- Enable lazy loading for images to load them only when needed.
- Remove unused assets like unnecessary CSS, JS, or images.
- Defer or async load non-critical scripts to prevent render-blocking.
- Host third-party scripts and fonts locally to avoid external server delays.
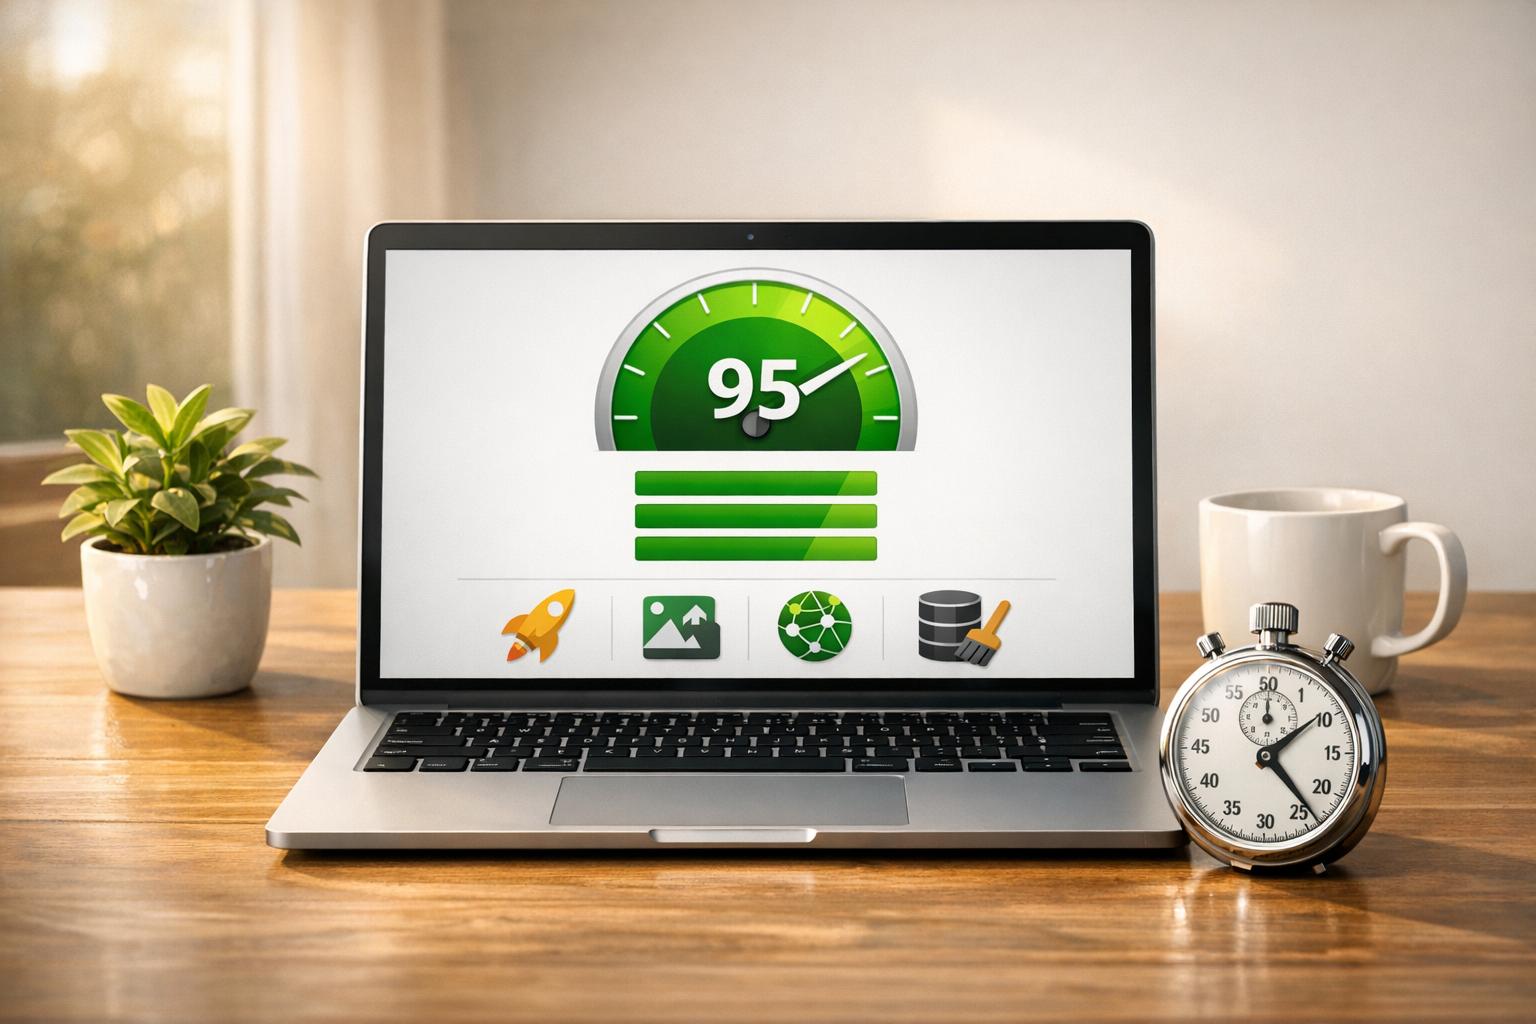
These steps can dramatically improve performance, reduce bounce rates, and help your site rank better on Google. Tools like WP Rocket, Autoptimize, and Chrome DevTools can help you implement these changes effectively.
7 Ways to Reduce HTTP Requests in WordPress: Performance Impact Statistics
How to Make Fewer HTTP Requests in WordPress
1. Combine CSS and JavaScript Files
Did you know that a typical WordPress page can load anywhere from 4 to 7 theme CSS/JS files and an additional 10 to 30 plugin files? Each of these files triggers a separate connection, which can slow down your site’s performance. By combining these files into bundles, you can significantly cut down on connection overhead and speed up your site. This is a key step in setting the stage for other performance improvements we’ll explore later.
"Each file requires connection overhead. One 50KB file loads faster than five 10KB files because you pay connection overhead once." – Pavel Ciorici, Founder of WPZoom
The benefits of file bundling are clear. For instance, a performance audit conducted in July 2024 on a WordPress test site revealed some impressive results. After enabling file combination (along with other optimizations), the total page requests dropped from 140 to just 18, an 87% reduction. This optimization also improved the site’s GTmetrix grade from "E" to "A", and the fully loaded time went from a sluggish 10.2 seconds to a speedy 2.3 seconds.
If you’re not already combining your CSS and JavaScript files, tools like WP Rocket, Autoptimize, or W3 Total Cache can automate the process for you. For developers building themes, tools like Webpack or Gulp are excellent for merging files before deployment. However, it’s crucial to test the changes immediately to ensure everything works smoothly. Issues like broken sliders or mobile menus can crop up, so check your browser console (F12) for JavaScript errors. If you encounter problems, exclude the problematic files from the combination process.
2. Use CSS Sprites for Images
Cutting down on image requests is just as important as merging files. CSS sprites tackle this by combining multiple small images – like social media icons, UI buttons, or logos – into a single image file. Once the browser downloads this single file, CSS properties such as background-image, width, height, and background-position are used to display only the specific part of the image needed for each element. Instead of making 10 separate requests for 10 icons, you only need one request.
"With a CSS sprite, the site only needs to load one image instead of five… the server only needs to handle one request, which accelerates the process." – Jetpack
To create a sprite, use tools like CSS Sprites Tool or Chris Coyier’s CSS Sprite Generator. Upload the resulting file to your WordPress Media Library, and then add the CSS provided by the tool into Appearance → Customize → Additional CSS. Use HTML with specific class names (e.g., <div class="sprite-icon-name"></div>) to display each individual icon.
It’s best to reserve sprites for decorative elements to maintain SEO and accessibility. For example, avoid using sprites for blog images or product photos, as this prevents you from adding unique alt text for each image. Google won’t be able to index individual images within a sprite for Image Search, and screen readers may struggle to interpret separate sections of the sprite.
Even though HTTP/2 and HTTP/3 support multiplexing (which allows multiple requests over a single connection), sprites are still handy for consolidating many small icons, especially when combining 10 or more tiny images (each under 1KB). For modern WordPress themes, you might want to consider using SVG sprites instead. SVGs are scalable and easier to manage compared to traditional PNG or JPEG sprites.
Next, let’s dive into how code minification can further reduce HTTP requests.
3. Minify CSS, JavaScript, and HTML Code
Minification is a process that strips out unnecessary characters – like line breaks, spaces, and comments – from your code without altering how it works. By doing this, you can shrink file sizes considerably: HTML files can be reduced by 10–20%, CSS by 15–30%, and JavaScript by 20–40%. These savings might seem small on their own, but across multiple files, they add up fast.
"Minification is one of the lowest-effort and safest optimizations you can use on any website. It removes what the browser doesn’t use, resulting in the same functionality with a smaller file size." – Adame Dahmani, Product Manager at WP Media
If you’re using WordPress, most optimization plugins make minification a breeze. Tools like Autoptimize (a free plugin) can handle HTML, CSS, and JavaScript minification while also merging files to cut down on HTTP requests. For more advanced features, WP Rocket combines minification with caching and lazy loading, while WP Super Minify offers a simpler, lightweight solution (with a 4.1 rating on WordPress.org).
Before diving in, always back up your site. Start small – enable minification for one file type at a time. For example, begin with CSS, then move to JavaScript. After each change, test your site in an incognito browser window and check the console for errors. If any files cause issues, you can exclude them from the process.
For even better results, pair minification with GZIP or Brotli compression. This combo can make a huge difference. In one documented case, it improved a site’s Largest Contentful Paint (LCP) from 5.4 seconds to 2.1 seconds.
Once you’ve tackled minification, consider implementing lazy loading to further enhance how your site delivers assets.
4. Enable Lazy Loading for Images
Lazy loading is a technique that delays the loading of images until they’re about to appear on the user’s screen. By postponing image downloads until they are needed, this approach reduces unnecessary HTTP requests. Given that images make up 50% to 70% of all HTTP requests on most websites, lazy loading can significantly improve your initial page load time.
Since WordPress version 5.5, native lazy loading has been a built-in feature, supported by over 95% of browsers worldwide. WordPress automatically applies the loading="lazy" attribute to images with defined dimensions. These images begin loading 1,250 pixels before they appear on fast connections or 2,500 pixels on slower 3G networks. This built-in capability helps themes perform more efficiently.
"Lazy loading defers offscreen images, videos, and iframes until needed, reducing unnecessary requests. This eases pressure on bandwidth and processing, helping the browser manage the main thread and critical rendering path more efficiently." – Adame Dahmani, Product Manager, WP Rocket
However, not all images should be lazy-loaded. For example, above-the-fold images, like your logo or hero image, should load immediately to ensure a good Largest Contentful Paint (LCP) score. To exclude these critical assets, you can add the data-no-lazy="1" attribute to their image tags.
For more advanced setups – such as managing CSS background images or replacing YouTube iframes with lightweight preview thumbnails – plugins like WP Rocket or Perfmatters can be helpful. Once configured, you can use Chrome DevTools to confirm your setup by filtering the Network tab for "Img".
sbb-itb-976b402
5. Remove Unused Images and Assets
Your WordPress theme probably includes CSS files, JavaScript libraries, and images that never actually load. These unused assets create extra HTTP requests, adding to the performance issues we’ve already discussed. To put it in perspective, a typical WordPress page can generate anywhere from 10–30 plugin-related CSS/JS requests and 10–50 image requests before you even add custom content. It’s easy to see how this bloat adds up quickly.
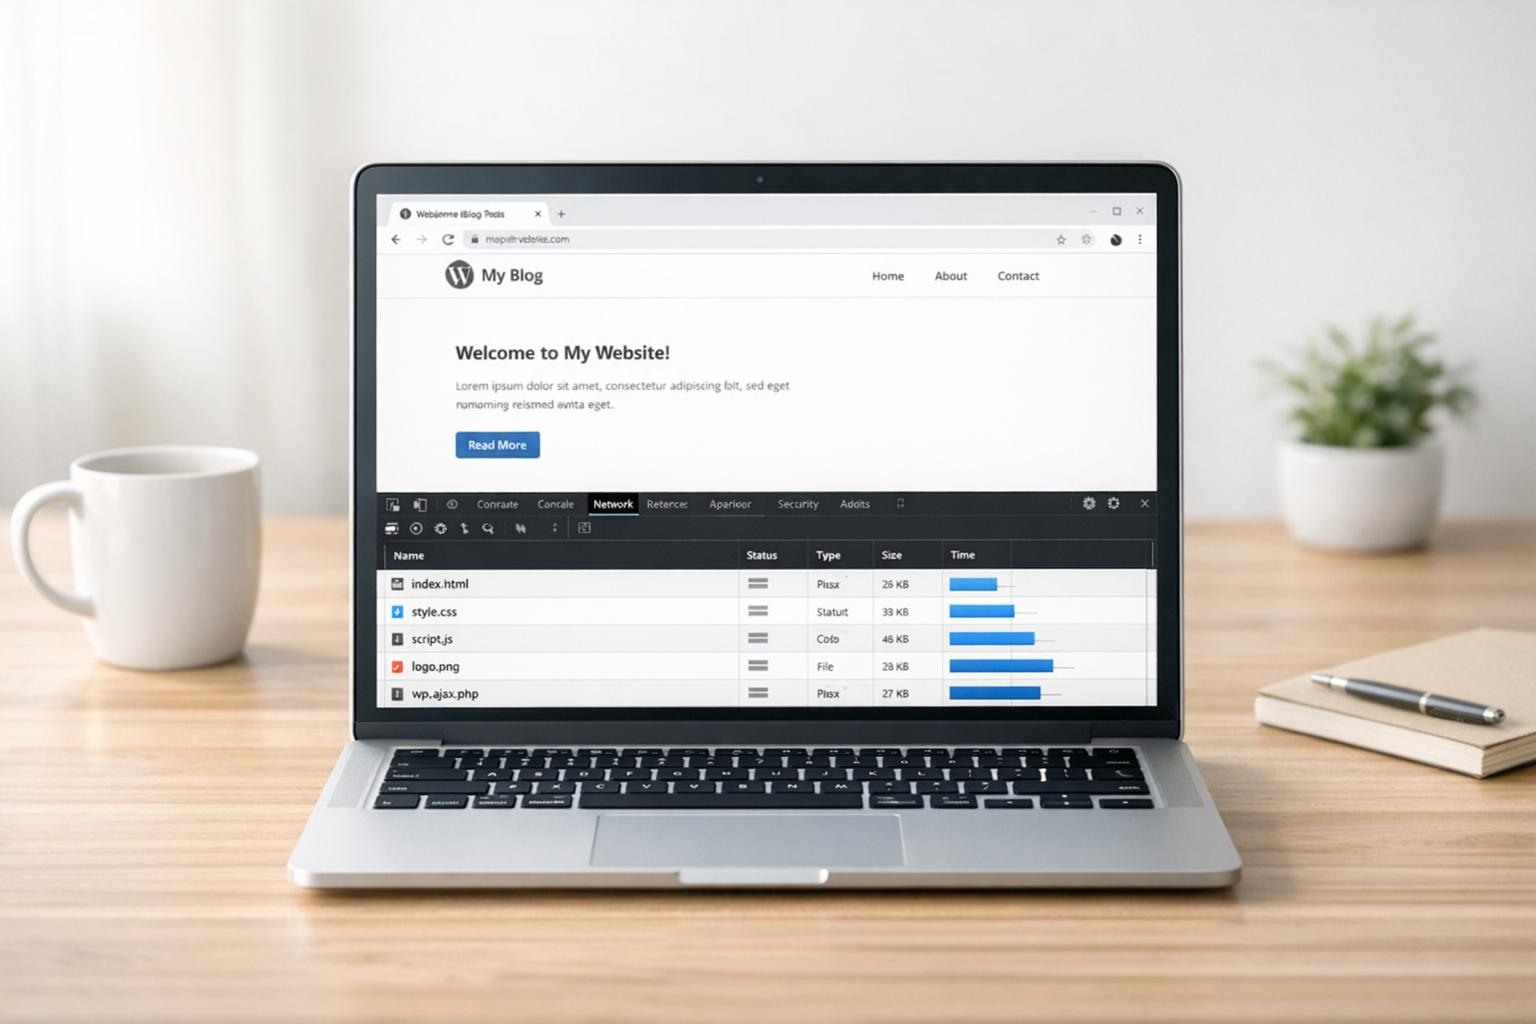
Start by figuring out what’s actually being loaded on your site. Open Chrome DevTools (press F12), go to the "Network" tab, and reload your page to see a list of all requested files. This method builds on the merging and minification steps mentioned earlier, helping you identify assets that can be removed entirely. Sorting the files by the "Time" column can highlight the slowest-loading ones, which are often prime candidates for removal. For a more comprehensive analysis, use Google PageSpeed Insights. Its Diagnostics section will flag unused CSS and JavaScript files, providing specific filenames to review.
If you want more control, plugins like Asset CleanUp can scan your pages and show every CSS and JavaScript file being loaded. This allows you to selectively unload assets on a per-page or site-wide basis. To avoid unintended disruptions, enable "Test Mode" first to preview changes without affecting live visitors. Tools like GTmetrix can also provide detailed waterfall charts, showing which plugins contribute the most requests. Look for "wp-content/plugins" in the report to pinpoint the culprits. These tools are an excellent starting point for identifying unnecessary assets before implementing broader changes.
Before you delete any theme files, make sure to create a full backup. Removing the wrong asset could break key features like mobile menus, contact forms, or checkout processes. Test all changes on a staging site first, and keep a copy of the original files just in case. After making edits, use the Console tab in your browser’s DevTools (press F12) to check for JavaScript errors and address any issues immediately.
Eliminating 50–70% of unused CSS can significantly boost your site’s performance and help you meet Core Web Vitals benchmarks. Considering that 53% of mobile users abandon websites that take more than 3 seconds to load, cleaning up unused assets can not only speed up your site but also reduce visitor drop-off. This step sets the stage for even more improvements in your theme’s performance.
6. Defer or Async Load Non-Critical Scripts
To improve how quickly your WordPress site displays content, consider deferring or async loading non-critical scripts. Normally, when a browser encounters a JavaScript file while loading a page, it pauses HTML parsing to download and execute the script. This behavior, known as render-blocking, can slow down the initial display of your page. By using defer or async attributes, you allow the browser to continue rendering the HTML while loading scripts in the background, reducing delays during the initial load.
Defer delays script execution until the HTML parsing is finished, making it ideal for scripts that depend on the DOM, like interactive menus. On the other hand, async loads scripts as soon as they’re downloaded, making it best for independent scripts like Google Analytics.
In WordPress 6.3, you can set a loading strategy directly in wp_enqueue_script(). For example:
wp_enqueue_script( 'handle', 'src', array(), '1.0', array( 'strategy' => 'defer', 'in_footer' => true ) ); However, be cautious when using async with jQuery, as many WordPress plugins rely on it being fully loaded. Misusing it could result in "jQuery is not defined" errors.
If manually adding attributes feels too technical, you can rely on performance plugins like WP Rocket, Autoptimize, or Perfmatters to automate the process. After implementing changes, test your site for errors using tools like Chrome DevTools.
While defer and async won’t reduce the total number of HTTP requests, they help your site load faster by preventing scripts from blocking the page rendering process. This keeps visitors engaged and supports better Core Web Vitals scores.
7. Host Third-Party Scripts and Fonts Locally
When your WordPress site loads resources like Google Fonts or tracking scripts from external servers, the browser has to go through a series of steps – DNS lookup, establishing a connection, and waiting for a server response. Each of these steps adds 20–100 milliseconds to the loading time per request. Hosting these assets locally can eliminate this delay and give you complete control over caching and compression.
"By taking control of your font files, your site can skip those extra loading steps, ensuring a blazing-fast website with better user experience and SEO." – WPBeginner
Managing these external requests doesn’t just improve speed – it also enhances the performance of other theme assets. For fonts, you can use a plugin like OMGF to serve Google Fonts locally. This approach not only speeds up your website but also ensures GDPR compliance by preventing Google from logging IP addresses. Another option is to download WOFF2 font files, upload them to a /fonts folder in your theme directory, and link them using the @font-face rule in your CSS.
For tracking scripts, hosting them locally is a smart move. Tools like CAOS can help you manage Google Analytics, while plugins such as WP Rocket or Perfmatters can do the same for Facebook Pixel. This setup reduces third-party requests and gives you control over caching. Keep in mind, though, that local scripts need manual updates or plugin support to stay current.
If hosting resources locally feels too technical, you can use resource hints like dns-prefetch or preconnect to speed up connections. However, these methods don’t offer the same caching and compression benefits as local hosting. By localizing these assets, you can fine-tune your site’s performance and prepare it for the final optimization steps.
Conclusion
Cutting down on HTTP requests in your WordPress theme can give your site a noticeable performance boost. By combining CSS and JavaScript files, enabling lazy loading, minifying code, and hosting third-party resources locally, you tackle the front-end issues that can slow your site down and frustrate visitors.
These optimizations can turn a sluggish site into a fast, smooth experience. And speed matters – a lot. 53% of mobile users leave a site if it takes more than 3 seconds to load, and just a single second of delay can reduce conversions by 7%.
Achieving optimal performance – ideally under 25 requests per page – requires a mix of techniques. Start by using tools like GTmetrix or Chrome DevTools to pinpoint your biggest bottlenecks. From there, you can apply the most effective strategies for your site. For pages heavy with media, lazy loading can significantly reduce initial requests. If plugins are the issue, combining files and using conditional loading can make a huge difference. These steps lay the groundwork for a faster, more efficient website.
If these tasks feel overwhelming or you’re concerned about disrupting your site’s functionality, bringing in professionals can be a smart move. WP Support Specialists offers expert WordPress services, including performance tuning, code audits, and custom solutions tailored specifically to your site. Their know-how ensures you get the speed you need without sacrificing functionality.
FAQs
How can I combine CSS and JavaScript files in my WordPress theme to reduce HTTP requests?
To merge CSS and JavaScript files in your WordPress theme, begin by identifying the files you want to combine. Open your theme’s functions.php file and look for wp_enqueue_style() and wp_enqueue_script() functions. These calls specify the CSS and JS files currently being loaded. Once identified, you can manually combine these files into a single combined.css and combined.js, or use a build tool like Grunt or Gulp to automate the process.
After creating your combined files, you’ll need to update your theme to use them. First, deregister the original files using wp_deregister_style() and wp_deregister_script(). Then, enqueue the new combined files in functions.php to ensure WordPress loads them instead of the individual ones. If manual work isn’t your style, plugins like Autoptimize can handle this process for you automatically.
Once everything is set up, test your site’s performance with tools like PageSpeed Insights or GTmetrix. These tools help confirm that HTTP requests are reduced and your site’s functionality remains unaffected. If you want a hassle-free solution, professional services like WP Support Specialists can assist with optimizing your WordPress setup.
How do CSS sprites improve website performance?
CSS sprites are a clever way to bundle multiple small images, like icons or buttons, into a single image file. This approach cuts down the number of HTTP requests your site needs to make, which can significantly speed up page load times and boost performance. Instead of fetching multiple files, your server only has to deliver one, reducing its workload and improving caching efficiency.
Sprites also make managing images easier. When you update a single sprite sheet, all related images across your site are updated automatically. This keeps your design consistent and minimizes the chances of broken image links. For WordPress themes, incorporating CSS sprites can elevate the user experience while positively impacting key performance metrics like Core Web Vitals. Need help with implementation? WP Support Specialists can fine-tune your theme to ensure it runs at peak performance.
Why is it better to host third-party scripts and fonts locally on my WordPress site?
Hosting third-party scripts and fonts directly on your server can make a noticeable difference in your website’s performance. By cutting out extra DNS lookups and external requests, your pages load quicker, creating a smoother experience for users. Plus, you gain complete control over caching, compression, and minification – key factors that can enhance your SEO efforts.
On top of that, managing these assets locally helps tackle privacy and compliance concerns, like those related to GDPR, by minimizing dependence on external providers. This method not only speeds up your site but also makes it more secure and finely tuned for your audience.