We’re often asked by people using the WordPress WooCommerce plugin how to add new products to their store. And the good news is that it isn’t tricky so long as you approach things logically.
To help out all you WordPress newbies who want to keep their eCommerce store up to date, we’ve put together this simple guide.
Firstly from your dashboard, navigate to Products > Add Product
Then you can add the product name at the top, and choose the category where the product belongs on the right hand side.
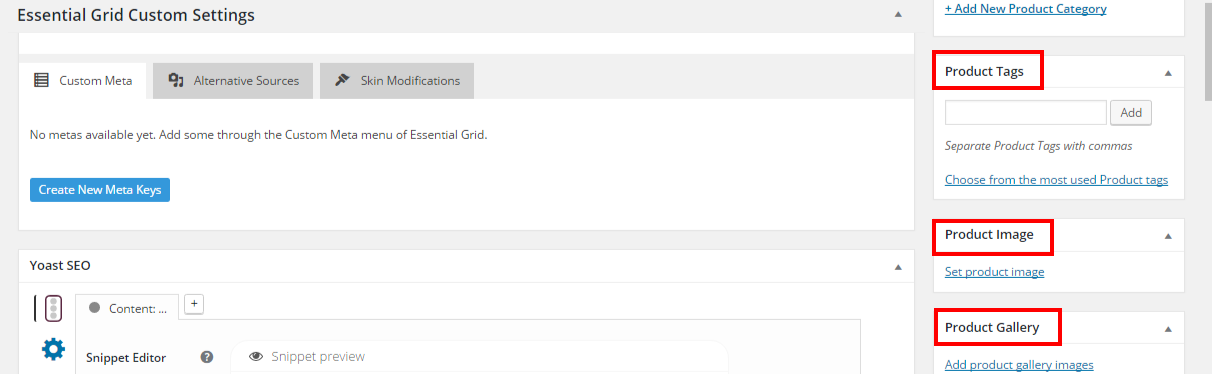
1. Add Product Tags and Product Images
Scroll down the page. You’ll find the section to add product tags on the right hand side.
You’ll need to set product image in the section below, and the product gallery is where you can add additional images.
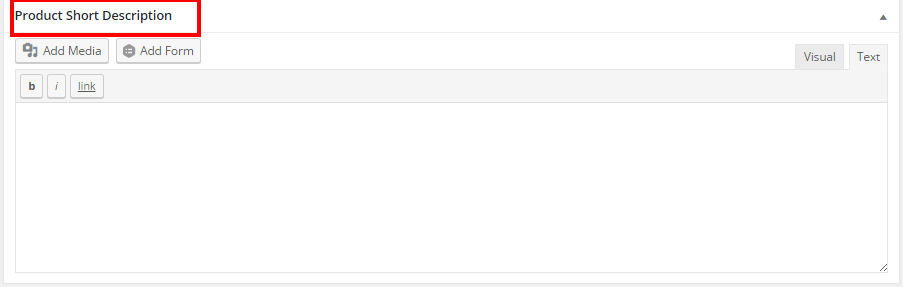
2. Add Product Description
Scroll down the page…down, down, down. At the very bottom you’ll find the Product Short Description where you can describe your product in glowing terms.
3. Choose Product Type
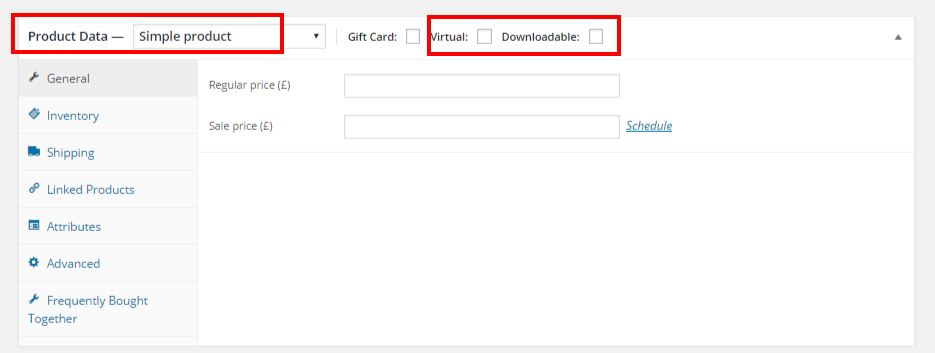
Firstly you need to understand the different types of product.
- Simple Product – this covers the vast majority of products you may sell. Simple products are shipped and have no further options. For example a book.
- Grouped product – a collection of related products that can be purchased individually and only consist of simple products. For example, a set of six drinking glasses.
- External/Affiliate product – one that you list and describe on your website but is sold elsewhere.
- Variable product – a product with different variations, each of which may have a different SKU, price, stock option, etc. For example, a T-shirt available in different colours and/or sizes.
- Virtual product – one that doesn’t require shipping. For example, selling a service.
- Downloadable product – similar to a virtual one but where customers are given a downloadable file. For example, a PDF magazine, ebook or photo.
Once you have identified the type of product you are selling, you can choose the right option.
4. Add General Information
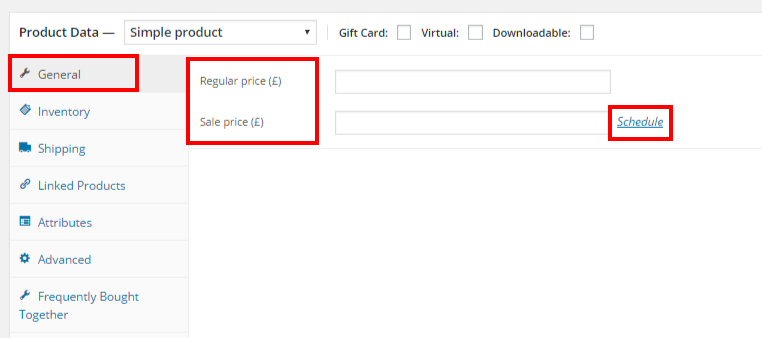
- Regular Price – add in the regular price of the product.
- Sale Price – add in any discounted price (if applicable) which can then be scheduled to run at certain dates.
5. Manage Inventory
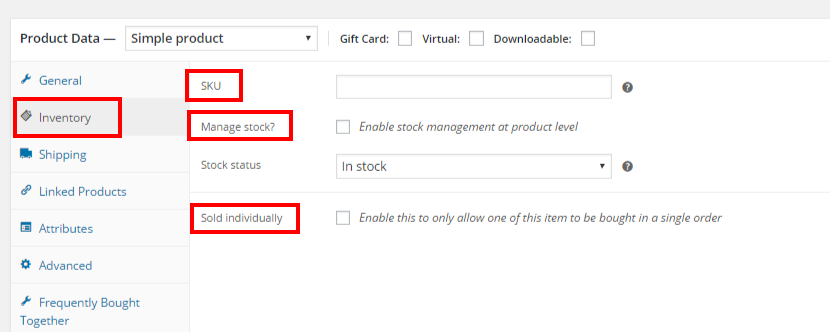
SKU (Stock Keep Unit) tracks products. It must be a unique identifier for each product and must be formatted so that it is different to post ID numbers. Since post ID numers are numerical, it makes sense to create SKUs using a mix of words and numbers eg. TS01 T-Shirt 01
Click on the “manage stock?” checkbox to enable stock management for the individual products and define whether to allow back orders.
If you click on the “Sold Individually” checkbox, the system limits the product to one per order.
6. Define Shipping Details
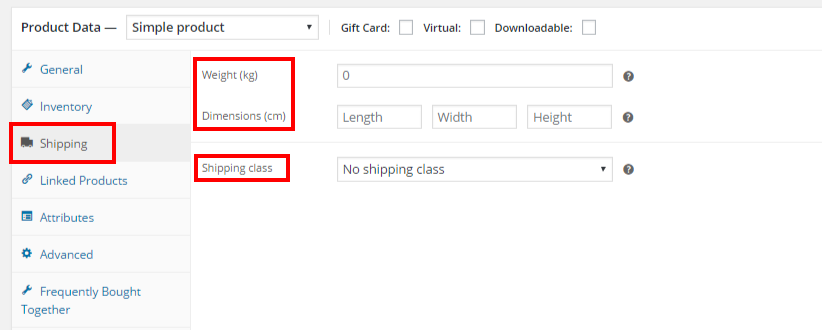
Simply add in the weight (kg) and dimensions (cm) of the product.
The Shipping Class option is used by certain shipping methods to group similar products.
7. Set Up Linked Products
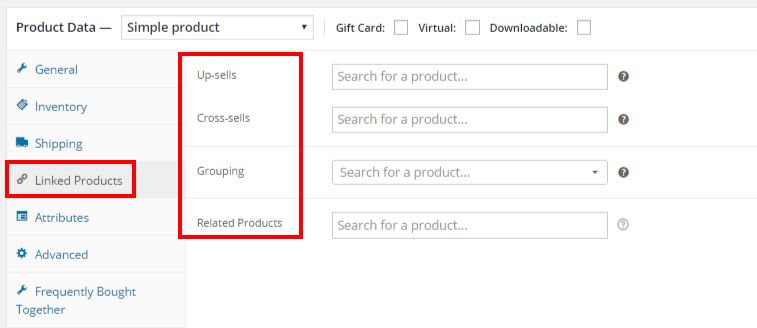
This section allows you to cross promote your products. You can choose:
- Up-sells – recommend an alternative product to that being current viewed (better quality / more expensive / more profitable)
- Cross-Sells – promote other products, based on those currently in the basket
- Grouping – make the product in the basket part of a grouped product
- Related products – link to related products which will be shown on the product description page
8. Set Attributes
In this section you can assign details to a product such as weight, colour, size etc.
Once you have chosen an attribute from the select box, click “add” and assign values from the drop down list. Alternatively add a new “value”, then save attributes.
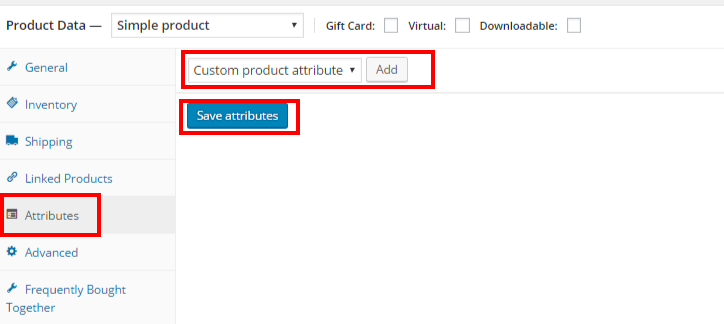
If you leave the “Visible on the product page” unticked, the information won’t be shown on the frontend.
9. Advanced Bits n Bobs
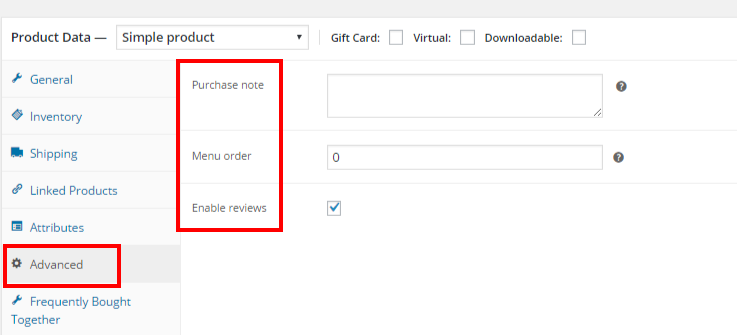
This section enables you to:
- Purchase note – enter an optional note to send the customer after they purchase a product
- Menu order – Customise the ordering position for this item.
- Enable/ disable customer reviews for this item
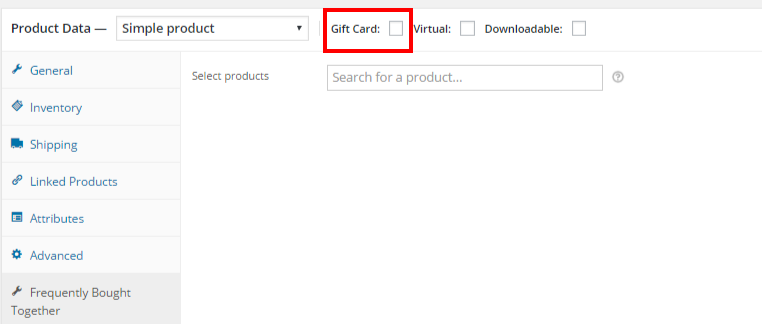
10. Set Up Gift Card Option
If you wish to set a product as a gift, simply tick the Gift Card checkbox.
And there you have it! You have successfully added a new product to your WooCommerce ecommerce store and by simply publishing the page, it will be visible to your website visitors.
If you found this guide useful please share on your preferred social media site below or send to a friend in need via email.